Showing posts with label Nee's Recipes : Bread and Buns/Paus. Show all posts

Tuesday, March 10, 2009

Repost and Edited: Our Daily Bread ~ Wholemeal

I am doing a repost on our wholemeal bread because I made some improvements to the original recipe. This is something that I will consistently do from time to time, especially when I can find ways of making the recipes better. It's sort of like a software upgrade.

I've noticed that I've been getting rather interesting readers lately which included those who really wanted to know if my recipes work. Much as I appreciate such straight-forwardness, ehmmm... I don't really know how to answer these questions with tact.

I have to say that I'm a self-professed perfectionist when it comes to my food. As Greg would attest, I get into a very lousy mood if my dishes do not turn out the way we/he/I like them. Then he would see me staring into space with the-world-is-so-lousy look on my face. My sweet hubby is always very patient with me and he would say "Hey, look. You are not a professional chef. That is homemade bah. You know, housewife standard. And you are not even a full-time housewife, you're working for goodness' sake. You are even barely a semi-housewife." Whether that made sense or not, but it does make me feel better.

So, you can be rest assured that the recipes on this blog have all been tested, tried, experimented, cooked & baked before by me personally, fully eaten, tasted, critic'd and digested into our tummies and we think they are nice at that point in time. Well, at the very least, whatever I put up had worked for both Greg & me in terms of what we thought was good.
There are actually many dishes in my draft folder which I think could be improved further and done better. And they will stay there till I am ready. I will also try to give as much detail as possible so that you don't have to go through the same pitfalls like I had too. All I can say is they are honest recipes. So if it doesn't work, there could be many reasons, some of which may be related to personal cooking skills, experience and availability of certain ingredients.

Of course, there may be recipes which we've already posted, but to later realise in my sleep that there's one or two more additional steps which can make it better. For example, the Red Bean Creme and the just edited Kaya, and now the wholemeal bread. But of course, we're doing the best that we feel we can. You may not necessarily agree with the standard of our recipes, but you can always use it as a guide and to improve them to your own taste and standards. Anyway, that is what cooking and eating is all about ~ personal pleasure, taste and touch.

Anyway, we hope that you've been enjoying the recipes that we've been putting up here. They're sincerely from the heart, & for sharing with all of you dear readers. I would also like to thank the many of you out there who has shared your successes from your attempt in using the recipes from this blog. I really appreciate your appreciation! You guys are the gems!

Original post:
I have finally gotten back to making bread for the past two weekends after feeling very guilty about buying wholemeal loaves for quite sometime. Commercial bread and buns tend to come with artificial agents such as bread improver and bun softener. Although I have no idea what they are but they sure don't sound very attractive to me. The commercial bread also uses shortening as fat because they are cheaper and they don't harden after the bread cools.

I love my own bread goodies even though it may not be so professionally done. Greg thinks that looking at my bread gives him the same comfort as looking at his own pillow. It's almost like a soft toy to him. Many times, he'd rather hug than eat them. I can understand that, cos homemade bread is just so nice because of its freshness.

Did you notice that bread and buns from shops tend to be fluffy, silky smooth and airy? I think this is the effect of the additional ingredients. My bread and buns are fluffy but they are slightly more compact. That's the way we like them - compact & country-like. We just realised that we could last longer on 2 pieces of our own bread than 4 pieces of the commercial ones.


Edited:

Make 2 loaves
600 gm of bread flour or high protein flour
125 gm of wholemeal flour, wetted
50 gm of castor sugar
1 1/4 heaped tbsp (with proper measuring spoon) or 15-16 gm of instant active yeast
10 gm or 1 tsp of salt
300 to 350gm of cool water/water cum milk
60gm of corn oil/butter (you can use shortening if you want. It makes the bread silky or butter)

1) Sift bread flour into the mixing bowl. Rinse wet the wholemeal flour by running water over the flour on a sift. Squeeze up the water off the wholemeal flour. Add wetted wholemeal flour, instant yeast, salt and sugar. Turn to Speed 1 to gently mix all ingredients even.

2) Slowly add about 80% of your liquid (water/water+ milk) followed by fat (the oil/shortening or butter). Turn to speed 2 (med-hi) and beat till all ingredients come together into a dough.

If it's too dry, add a little more from the last 10% of the liquid. Remember: Don't pour the whole amount of liquid all at once, as depending on your flour water absorption level, you may end up with a very wet dough. Add liquid a little at a time. The dough must be able to leave the side of the mixing bowl and it should not stick to your hand.

3) Continue beating on high for 10 to 15 min. Do the thin film/membrane test to check for readiness.

4) If dough is not quite developed yet, & the mixing bowl is already warm, take the dough out and hand knead it rigourously for a little while before shaping into a round, tight dough. Cover with clean cloth to rest for 20 min or until dough double in size. Resting at this stage makes it easier for shaping later. Divide into 2 and rest for another 10 min.

5) Shape the dough into a long (width wise) rectangle and roll towards you into a log/swiss roll shape. Place in well greased baking tin (19cm X 11 cm X 11 cm) and rest for another 1 hour 30 min to 1 hour 40 min (depending on heat and humidity) or til it rises about 90% of the tin height. Do the finger poke test.

6) Preheat oven to 165 deg cel fan forced. Bake for 25 to 30min till golden brown. Take out loaf and let it cool before cutting.

Friday, October 10, 2008

Bagels


Greg had always wanted me to make bagels because he had it in the States, and therefore had been missing it here. Well, I suppose there is no bread more Americanized than the bagels. It is such a popular and common New Yorker breakfast as a grab-&-go item. It is Americanized because I think the origin of bagels is somewhat Austrian and Jewish but made popular by the Americans. They come in the New York, Boston & Montreal style and so on.

When I saw Terri doing her bagels, I was really excited and so very tempted. And I am thankful that Terri pointed out some dos and donts, which saved me a lot of trouble. I did some extra research with cook books and websites, tried some recipes out a few times, and the results are generally very good with the following recipe where I substituted sugar with honey instead.


But I hestitated in blogging this until now because to be honest, I have not tasted the original bagels before. And these goodies hardly existed in Malaysia previously. And I do not usually want to blog recipes which I dont have a certain standard to compare with, or that I myself have not eaten before.

I was fortunate enough to be able to try some at Bagel Street at London Heathrow. They looked so good and tasted as good, & after that, I was convinced mine should be ok.


London's Bagel


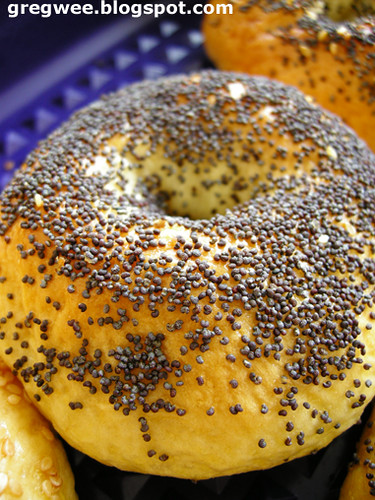
In case some readers may not know what a bagel is, it somewhat like a hard roll in a ring form with a glossy, puffy, brown exterior (sometimes topped with poppy seeds, sesame seeds, salt and onion, herbs). It has a chewy and dense interior. It is the only bread product that I know that has to be boiled and then baked in the oven. Bagels are usually eaten as sandwiches, slicing through a bagel to half it and to sandwich various fillings.

Bagel and Cream Cheese is a match made in Heaven. According to Jo and it is true, bagel, cream cheese and smoked salmon is to die for. And we all would agree that Bagels taste and look like Foochow Kompia. I really wonder about the link there.


Make 8-12 (New York Style)
450gm of bread flour or high protein flour
1 teasp of salt
2 teasp of yeast
1 heaped tbsp of honey
225 gm of water
2 tbsp of corn oil/canola oil
One medium pot of simmering water and 1 tbsp of sugar
Egg to wash
some sesame seed, poppy seed or salt and onion to top

1) Sift the dry into a mixing bowl. Add active yeast. Beat on medium. Add honey to 90% of the water. Slowly add honey water mixture to dry. Add oil. Add rest of water if too dry. Continue beating on medium till gluten develop. Do the film/membrane test.

2) Set aside to rest for 50 min or so till the dough double in bulk.


3) Shape into 65 (make 12)- 80 gm (make approx 10) balls. Make sure each ball surface is smooth. Rest for 15 min.

4) Punch a finger into the middle of each ball and jiggle and lightly pulled it to form a large hole about 1/3 of the overall bagel diameter. Rest for another 20 min.

5) Generously oil baking tray. Get ready a pot of simmering water. Drop the bagel one or two at a time into the water and boil about 1 min each on one side. This step is essential in creating the puffy and glossy surface later but bagels look all crumpily at this stage. Dish onto baking tray leaving some distance apart as bagels puff up during baking. Egg wash the top surface and sprinkle on toppings as suggested.

6) Bake at 175 deg cel fan forced for 25 to 30 min till nicely brown. Cool slightly before cutting and sandwiching.

Thursday, August 7, 2008

Veg and Meat Pao (Chai Rou Pao)


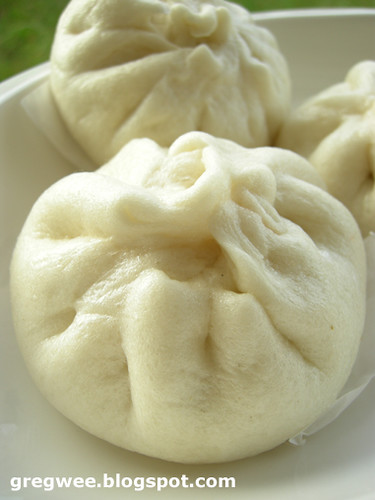
Meat and vegetable paos are really favourites of many people I know including my parents and my in-laws. In Chinese, it is chai rou pao, which is essentially a combination of meat such as minced pork or chicken, and minced vegetables such as wombok (wong nai pa), kua chai (bitter vegies), xiao bai chai (bok choy). It is a very simple yet comforting type of filling for white pau. The most famous of these paos are the Shanghainese Chai Rou paos.

The filling recipe is for one portion of pao quick dough divided into 40gm parts. It makes approximately 16 paos.

400gm of minced meat
1 tbsp of light soya
1 tbsp of salt (approximately, to taste)
1 teasp of pepper (approximately, to taste)
1 tbsp of minced garlic
3 tbsp of cooking oil
1 tbsp of cornstarch +2 tbsp of water
300gm of any one type of the veg suggested
1 small pot of boiling water + 1/2 teasp of salt and sugar

1) Blanch veg in the pot of water quickly. Remove and cool slightly. Chop into small pieces. Squeeze to remove water.

2) Season meat with seasoning. Heat up pan with oil and lightly pan fry garlic til lsoft and lightly brown. Add meat and pan fry till cooked. Add cornstarch mixture. Remove from fire.

3) Add veg to meat mixture. Mix well and taste for seasoning. Set aside to cool slightly before chilling in fridge for at least 3 hours. This will help with wrapping later on.

Sunday, August 3, 2008

Basic White Pao Dough


I love making Chinese white paos, and of course eating them as well. The best part is making them over the weekend, then storing them in the fridge, to be steamed up and eaten over the week. It makes morning breakfast much faster and easier, which is equal to waking up slightly later. Yes, you guessed it right, we are not those insane early birds. And I am not about to wake at 5 am to make paos for Greg.


I have never blogged about white paos before because I'm never really confident in making paos that are up-to-standard, in terms of the look. Even now I still cannot get 100% good looking paos - those with super smooth surface and white ones. In terms of taste, Greg and my FIL love them because homemade ones are always so packed with fillings. And if done right, they will be fluffy and will not stick to your teeth when you bite into them. I guess paos are one of those things that look simple to make and will generally be edible, but to make it great in terms of both taste and look, many little steps must be well executed.

As a standard, there are basically two types of recipes. The first is is the basic dough ones, which is very simple throw everything in and hence, fast. The results are generally good but if compared side by side with type 2, it tends to be tighter in terms of wrapping and bites.

Type 2 is a something like the sponge and dough method which requires an dough starter. Type 2 produces very nice, fluffy paos and if i put next to Type 1, this type is slightly smoother and whiter. And of course there is the Type 3 smiling pao, which needs a 2-day old dough starter to start , ammonia and all the stuffs and the good paos will crack up as if they are smiling and hence the name. Good smiling paus are light and fluffy.

Which ever type it is, there are generally a few standard rules to ensure good paos.

1) Good pao dough will not stick on three things ~ the bowl, the table and your hands. It is soft but not sticky. So definitely it will not stick on teeth when you chew on them.

2) It should be so well kneaded that when you slice through the dough, the inner part is smooth and practically has little or no airholes

3) Good kneading will gives whiter paos. Interesting, isnt it?

4) Do not overproof paos. It does not make it airier but rather it will create wrinkly or pocky faced after steaming.

5) Steam paos on med-hi fire, not high because high heat causes wrinkly surface or pocky face paus.

6) Do not remove steamer from the bottom boiling water or take off the lid immediately. Let paos sit in steamer at low fire for 1 min, remove steamer from hot water and let it sit on a edited: I think it is better to sit over say an wire mesh cake stand or on top of the sink (for cold air from bottom to flow upwards, pushing the hot air out) for 30 secs before removing the lid. This step will help in having smooth surface pao. The concept is we dont want a sudden difference in temperature.

Type 1: Basic Quick Pao Dough
500gm of good quality superwhite pao flour
100gm of icing sugar
50 gm of shortening/crisco
2 teasp of instant yeast
230-250 gm of room temperature water

1) Place sifted flour with sugar and yeast in a mixing bowl. With a dough beater, turn on low and mix the dry.

2) Add water, followed by shortening. Mix until all ingredients come together into a smooth dough that does not stick onto the bowl. I would generally hand knead (motion of washing clothes) as I go along. Using a dough cutter, cut and check cut surface. Dough is only ready if the surface is very smooth. Rest cover for 15 min.

3) Divide into equal balls and roll each balls into a small round smooth dough. If you are making a small recipe (say 1/2 of the above recipe), the balls at this stage should rest for 10 min. But if you make this quantity, by the time you shape the last ball, the first ball should be well rested already. You can proceed with wrapping the first ball.

4) Start wrapping and shaping with filling. Rest for another 10-15 min (depending on how fast you can wrap a tray of pao for steaming. If you are very slow, then rest for 10 min only. otherwise the first paos will be rested too long). Steam as per Rule 4 and 5.

Wednesday, May 7, 2008

French Bread


I did some research over the week and realised that French stick or bread or loaf is actually an English name for French Baguettes. Baguettes are basically those bread with much more smaller diameter compared with length. But French are strict and have more exact standard and name for those loaves which are thicker or thinner in their diameters. But the standard is around 5-6 cm to not more than 10 cm.

To make life simpler, I will just called it French bread or loaf. I did one french loaf some weekend ago and then also for Greg's party. The loaf was made a day before the party for the Bruschetta. Fortunately, the french loaves all turned out well. They were brown and crusty on the outside and a little chewy in the inside, just the way french bread (baguettes) should be.

Standard French loaf consist of basic water, flour, yeast, common salt. But I also did a little experiment with shortening. For one of the loaves, i added one small tablespoon of shortening but kept the others original. The results:

Just from that one tablespoon of shortening, the loaf inside became softer & silkier. But the taste is equally as good as the original. And there was no effect whatsever on both the crustiness & chewiness of the bread.

It took a while, & a little bit of experimentation. But now I'm confident that the recipe can now be shared with you. I leave the decision to add shortening or any other form of fat up to your own discretion.

400gm of bread flour or high protein flour
8 gm of active instant yeast
8 gm of salt
1 tbsp of shortening (optional)
1 tbsp of castor sugar
220-240gm of slightly chilled water

1) Sift flour and mix all dry ingredients together in a mixing bowl.

2) With a dough beater, beat at No 1-2. Very slowly add 90% of the chilled water. Continue mixing till all ingredients bind together. Add rest of water if too dry.

3) Beat at medium for 15 -18 min or high for 10 -12 min. In between the beating, try the membrane test. A thin membrane indicates that the glutten has formed and dough is ready. But you must stop if the side of bowl feel slightly warm. A warm dough indicates that yeast may be taking action already.

4) Take it out of bowl and hand knead it to release all air bubbles. Shape into a round dough.

5) Rest the dough, covered with clean cloth for about 15 min before further shaping. Divide the dough into 2 equal parts and shape into round two round balls. Rest further for another 10 min

6) Roll each into a long rectangle (lengthwise) and roll towards yourself. Roll slightly more towards the middle of the dough to form the loaf shape. Seal ends and bottom well. Place on a greased tray. Make three slanted slits along the loaf.


7) Proof cover with cloth for 50 min to 1 hour 15 min depending on weather. Do the finger poke test.

8) Preheat over at 170 degree celcius forced fan. Spray your hot oven generously with water. Bake for 15-20 min till golden brown.

Cool, cut and serve as bruschetta/garlic bread or with a nice thick broth.


Tips:
Same recipes apply for shorter baguettes (not very sure whether it is called batard. Anyone?) used as sandwich loaves. After step 4, rest for 10 min. Divide dough into 4 equal portions and knead into smaller bowls. Rest for another 10-15 min. Enough resting makes rolling easier. Follow with step 6 onwards but cut one, straight long slits on each one.

Wednesday, April 23, 2008

Cripsy Dough Pizza

Italians have their pizzas thin and crispy, and the topping simple. Yet it is that simplicity that carries the freshness, and the taste of the ingredients, and the skills of the chef through.

The bread-dough kind of pizza is, I believe, a little too Americanized. Pizza Hut is one example. It has become the main culprit & has cleverly positioned itself to be the generally accepted version of what a pizza should be. Actually, it's also a matter of personal taste. Some people like the doughy-bready effect on the crust (like my parents), but for us, that is a no-no. We'd go for the thin crispy crust instead.

I've had many excellent cooks giving me their theories of how to make good Crispy Thin Based Pizzas. Some of them have strongly suggested to use high protein flour, while others insisted that it must be well proven for many hours, and Aunty Linda insisted on putting it in the fridge before shaping.

It's all too confusing for me as none of them really worked out well. Usually, it's either not thin and crispy enough, or it's too difficult to roll into a nice round shape. Besides, I get suspicious when theories are too complicated because I believe the basic underlying reason why humans cook is still just to eat and survive. So there should be some sense of simplicity in the process.

Granted, ingredients may be complicated because some may be unavailable in different parts of the world but the process in cooking & the recipes themselves should be much more simpler, since they originated from someone's simple kitchen a long time ago. And when the cooking process & recipes are commercialised for mass production, they become even more simpler to reduce cooking time.

Therefore, it is always a challenge for me to unravel the mystery of simplicity in every complicated dish.

I have actually thought of a simple rule to 'de-confuse' myself:

Bread dough type of pizza, which is classified more like a bread, is made differently and ingredients differ slightly from crispy dough ones. They have different recipes and of course different end products. Dont try making the bread dough type of pizza using thin crispy dough recipes and vice versa.


I had recently obtained some tips about making this dough from a well known Western cooking chef in Kuching, Chef Sarah, at her cooking demo. The results were excellent and the steps were simple, almost cooking-idiot prove. For the first time, Greg actually finished almost the entire 12-inch pizza by himself. His actual words, "I did not know that pizza can be nice." Pizza Hut had really traumatized him and spoilt pizzas for him.

Here's what you need:

400gm of plain flour
100gm of semolina
250 gm of plain water
25 gm of olive oil
12 gm of salt
3 gm of active yeast instant

1) Sift flour and mix all dry ingredients together.

2) Start beating on no. 1 with a dough beater. When ingredients are mixed, slowly add in water. Then finally oil. If you find that the dough is still dry and has not fully come together, add a little water (be very sparing).

3) Beat on speed no. 2 to 3 until the dough completely leaves the side of bowl, and if you lift from machine, it does not stick onto your hand at all.

4) Sprinkle a little flour on your work surface. And hand-knead the dough to release all air bubbles. The dough will feel tight as you knead, if there are little air bubbles. Knead into a big round tight dough as shown above.

5) Leave in a clean bowl, lightly flour for 20-30 min or slightly longer depending on humidity and weather.


Test for doneness:
Poke two holes in the dough with your fingers. If the holes become really shallow, it is ready.
You can also light press the dough: if it bounces back slowly, it is ready.

6) Divide the dough into 4 equal parts, about 200gm for each part. Lightly knead each part into a round tight dough. Put those that you don't need in the fridge in zip lock or airtight container. The dough can keep up to a week.


6) Lightly dust the dough, the work surface and rolling pin. Using the rolling pin, roll from middle out into a thin round sheet of 10 inch - 12 inch. Turn the dough over so that the rolling is done on both sides of the dough. Lightly flour surface after each turn. This method gives a very thin, easily rolled out dough that will not tear easily.


7) Preheat oven at 250 deg with your pizza pan. Place dough sheet on a pre-heat pan. Put on tomato coullis, mozarella cheese and toppings, followed back by some more mozarella cheese.

8) Bake at 250 deg celcius NO FAN FORCED for home oven, for 12-15 min (for my ovens) on the floor of the oven. Check the pizza base at around 8 min, and subsequent every 2-3 min to understand your own oven. If it is lightly browned with little batches of darker brown, it is ready. Results are guaranteed very crispy pizzas. Good Luck!

Thursday, November 1, 2007

Bread and Buns Tests

Nee's Wholemeal bread and loaf
In bread making, there are essentially three major dough variations ~ the bread dough for breads, sweet bun dough (used to wrap or with some other flavouring) and sponge & dough method (can made both breads and buns).

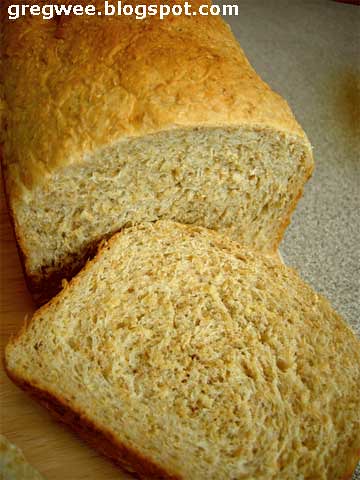
Homemade plain white bread. Cut into thick slices, perfect for French Toast.

Floss Rings made from sweet bun dough. Looks like spider legs. Many of our buns are made from this dough

Generally, bread and bun making uses high protein flour also called the bread flour (recent price increase from RM2.20 to RM3.00 per kg. *Sigh*), sugar, yeast, milk powder (optional) & salt as dry ingredients. Liquid like water & milk, eggs and finally fats like shortening or butter or cooking oil can be added. Recipes will generally vary depending on the portions added.

Of course, there are also other variations in the recipes which can create a whole range of bread items such as the American donuts, Italian pizza & foccacio (which usually incorporates fresh herbs), Turkish pita, English muffins, French bread, baguettes & cobs, danish & croissants. I love the smell of fresh bread and of course the smell of the house after baking breads and buns. Hmm so homey!

However, there are a few tips that can help to ensure good results:

1) Use castor sugar as granules are bigger which allow longer kneading.

2) Use cool water to make bread and bun because with long kneading, cool water will prevent the yeast to take reactions causing the rise in dough. Icy water will increase proofing time later on. Best is cool.

3) Do not put in the entire measurement of water called for in the recipes all at once. Always leave about 10% which can be incorporated later after the dough has formed. This is because different flours take in different amount of water.

4) Knead for about 15 to 20 minutes. The dough is only ready if it passes the film/membrane test. Take a little dough from bottom and roll into a little ball, stretch the dough gently until a thin membrane is formed without breaking. Repeat for the dough from the top. Thin film/membrane shows that the gluten in the dough had developed. If membrane broke easily, continue kneading for another 3-5 min. Repeat test.


5) Good shaping method will ensure nice end results especially buns (we do not want wrinkly surface). The roll and pull towards you motion can smoothen dough.


6) When proofing/resting, always keep dough in enviroment that is free of moving air like fan or air conditioner. Flowing air will cause the dough to dry out. Keep it covered with cloth that has water sprayed on (not wet, just slightly damp).

7) Usually, most recipes will ask you to proof till the dough double in the bulk or to wait for XX minutes or hour. But that is not the entire story. Depending on where we are baking, the proofing time do vary. Warm and humidity Vs Cold and dry has a distinct effects on the proofing time. The best test for me is the Poke Your Finger Test. After about 1/2 hour to 45 min of proofing, gently poke your finger on the dough. The dough will not sink and the finger mark will spring back ever so slowly. If the mark springs back very quickly, the dough is not ready. Wait for another 20 min to repeat the test.

8) Always use preheat ovens to bake. Bake till golden brown. 165 deg cel with fan is a good temperature. Baking usually take about 12 to 15 minutes for buns and 30 to 45 mins for breads. 45 min for bread that is baked with a covered top.

I had make a fair bit of blunders so hopefully, these tips will help. And of course there are surely things that I dont know. Let's share! Happy baking!

Nuffnang Ad