Friday, July 4, 2008

Fried Bee Hoon


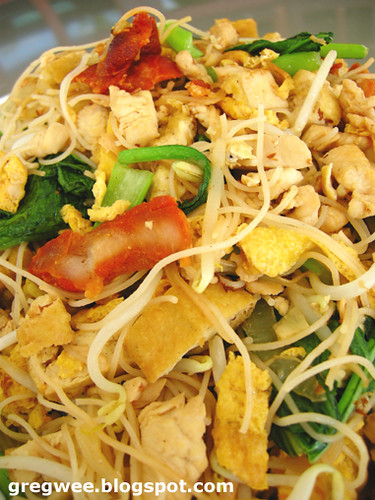
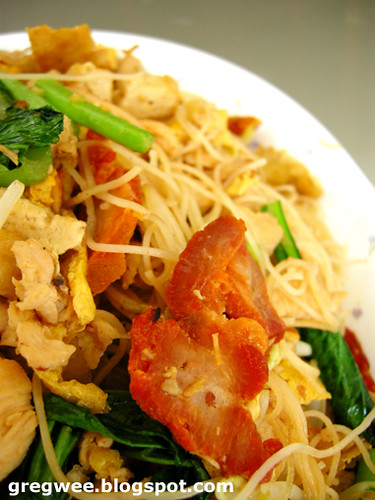
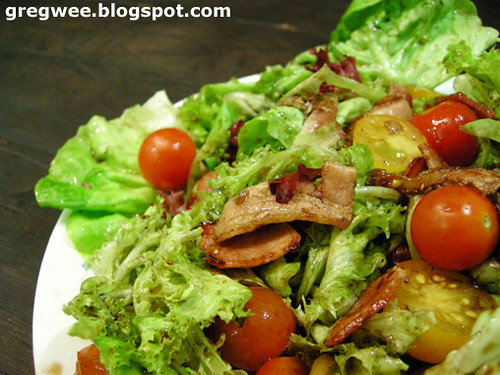
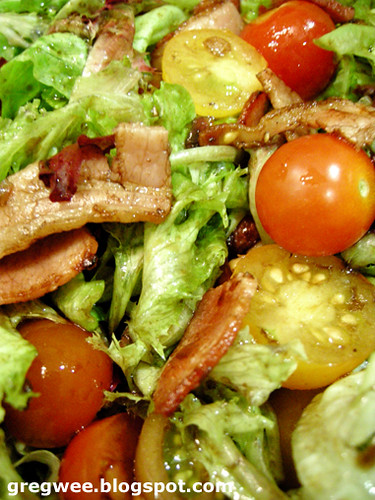
Greg and I always enjoyed Bee Hoon or Mee Fen (Mandarin), also known as Rice Stick among the fried carbs. Normally we like our Fried Beehoon clear and whitish, that is frying without dark soya. However, the usual ones available commercially are darkish in colour unless we are very specific about it. The ones in the pictures are done with a tad too much of light soya and the char siew, being commercial, actually coloured my mee fen. Hai...that is always the problem with outside food unless you know and frequent certain shops and are sure that they don't cost cutting in fancy ways.

I normally use Jiang Men Mee Fen from China. According to the grocer, this brand is good even for beginner cooks as it does not break up easily or gets gluey after frying. I find it quite true. Finding the right mee fen is important as some do not withstand the process of soaking, the rigorous tossing and stirring. A good plate of mee fen should be soft yet the bite is still there. It is really not attractive to eat a plate of breakup mee fen. Mee fen at home will never really have the wok breath of the commercial ones nor the oiliness, so dont expect that. But we can still make it tasty and wholesome.


Serve 4


1/2 packet of Jiang Men Mee Fen
200gm of chicken dices
80 gm of char siew or luncheon meat or prawns
2 no of eggs
1 piece of tofu gan, cut to 3-4 pieces
30 gm of bean sprout
50 gm of chives or 2-3 stalks of green vegies like chai sim, sliced
Other optional items ~ pork rolls, mushrooms
1/2 no of onion, chopped
1 tbsp of garlic, minced
6-8 tbsp of cooking oil

Seasoning Liquid:

Mix 200 ml of water with 1 tbsp of chicken powder + 1 tbsp of light soya + 1 tbsp of salt + some pepper + 1/2 tbsp of sesame oil and stir them well. Or use fresh 200ml of chicken superior stock + rest of seasoning. Dont ever throw in the seasoning separately because you tend to toss mee fen too long this way and if not evenly tossed, you may get some part salty, some part bland.


1) Soak Mee Fen till soft. Drain and set aside.

2) Season chicken dices with 1 tbsp of light soya, 1/2 tbsp of sugar, 1/2 teasp of salt and 1/2 teasp of sesame oil, 1 teasp of cornstarch and 1 tbsp of water. I normally like to season my meat a little as it gives not only a better fragrance but also smoother texture. Set aside.

3) Beat up eggs and pan fry to thin pancake like shapes. Slice up and set aside. Pan fry tofu gan pieces on all sides, cut them up and set aside.


4) With half of the oil, 1/2 of garlic and over high heat or the strongest fire you can manage on your stove, stir fry the mee fen with two metal cooking spatula or one spatula and one big cooking fork. This is to be done quickly. Dish out.


5) With rest of the oil, stir fry onion and the half of garlic till fragrant. Add chicken, and stir fry till white. Then char siew/luncheon meat/prawns are added. Stir to mix.

6) Vegies and bean sprouts, eggs slices, tofu gan slices are added in followed straight by mee fen in (4). As I can't do the tossing wok act even with two hands, the best option is to use two metal spatula to toss the mee fen for a min or two. This is a better way of cooking as compared to stirring, which tends to break up the mee fen. Add chicken stock seasoning. Continue tossing for another 2-3 min. Dish out and serve.

Thursday, July 3, 2008

Bacon and Nuts Salad


This whole month for me is filled up with seminars/courses, examinations and zooming in and out of the house. Actually Im' pretty sick about the whole thing. I just can't wait to go back to cooking and baking. At the moment, I'm too tired to cook anything with any level of complexity.

Tonight we had Bacon and Nuts salad, and Salmon with Lemon Butter Sauce. Bacon and Nuts Salad is so tasty, we can wallop the whole dish. I used mesclun salad, which is supposed to taste more superior than mature salad. And it is true, they are really easy to swallow and chew. Leaves that can be included includes lallorossa or sometime scalled red or green corals, baby romaine, red butter, butter lettuce and many others.


Serve 3-4


200-250gm of mesclun salad
6 pieces of streaky bacon
3 tbsp of nuts like pine nuts, walnuts, macadamia nuts, roasted
10-12 no cherry tomatos, halfed
Shaved Parmesan cheese


Vinegrattes

80 ml of olive oil
40 ml of balsamic vineger
1 tbsp of sugar
salt and pepper to taste
2 no of shallots, chopped


1) Clean salad and put on strainer to dry a little. Put it in a mixing bowl. Set aside.

2) Pan fry bacon without oil till crispy or for us, semi crispy. Set aside.

3) Prepare the vinegrattes. With the bacon oil and 2 tbsp of olive oil from the vinegrattes recipe, saute the chopped onion till fragrant. Mix with rest of olive oil, balsamic and sugar, and mix with a hand whisk. Add salt and pepper to taste. Toss salad with vinegrattes. Divide into 4 plates or place in a nice big salad bowl.

4) Sprinkle with pinenuts, cherry tomatos, bacon and shaved parmesan cheese and cracked black pepper. Serve.

Wednesday, July 2, 2008

Pineapple Fried Rice

When it comes to food, cooking and baking, I am a very unfaithful person. I consistently have new loves. The latest craze is Thai Food and Sweet Dessert Soup (Tong Shui) related items. But don't worry, I am still in the Italian food phase. With food, I can go crazy over certain cuisines for a period of time (usually not too long :P). Greg can attest that with every new infatuation, I would really research, buy cookbooks, spend hours/days/months on the internet, with endless phone calls to all my sifus/mentors and trying out the dishes many times.


If we talked about Thai Food in Kuching, people will straight away think of Lok Thian Thai Section. Lok Thian will then conjure up Pineapple Fried Rice. I personally think Tom Yum is Thailand's signature export. We have not been to Lok Thian for donkey years. The last time I ate there, this dish was still good. But I'm always worried and wonder whether they change their pineapple casings for every table. Hiak..am I scaring you?


Anyway, if I remember correctly, I saw Terri doing this dish a while ago with a pineapple casing too, and very impressively done I would say. I realised that my rice recipe is different, more of the Lok Thian's style, which we are more accustomed to.


Serve 2-3

Pineapple Casing:
1 kg of ripe pineapple with the crown and stem beautifully attached, or if you are serving for a party find a nice big one.

1) Find an angle that is more presentable and slice the skin a little off the bottom so that the pineapple can sit firmly on a plate.

2) Then slice off the top, starting at 2-3 cm above the stem. And slowly dig out the pineapple flesh with a paring knife. Leave about 1/2 inch thinkness on the sides and bottom. Set aside.


The Rice:
350 -450gm of cold cooked rice, preferrably overnight.
200 gm of chicken thigh, cubed
100 gm of prawn, deveined, deshelled and cubed
1 1/2 cup of pineapple, cubed
3 no of shallots, chopped
3 tbsp of vegie oil
1-2 tbsp of light soy sauce
2 tbsp of fish sauce
2-3 heaped tbsp of curry powder like Babas
3-4 tbsp of sultanas
4-5 tbsp of meat floss
Chopped spring onion
Seasoning ~ salt, pepper and msg to taste

1) Season chicken dices with 1 tbsp of fish sauce, 1/2 teasp of salt and 1 teasp of sugar, 1 teasp of cornflour and 1 tbsp of water. Set aside.

2) Cut the dug out pineapple into approximately 1 cm cubes. Wet rice to loosen the grains.

3) Heat up oil in a wok. Stir fry chopped shallots till fragrant. Add chicken meat. Cook till white. Add prawns. Cook a little. Add rice. Continue stir frying till ingredients are well mixed.

4) Add fish sauce and light soya. Then add the pineapple cubes, followed by curry powder. Stir fry till fragrant. Add seasoning to taste.

5) Lastly add sultanas. Stir a little to mix well. Dish out into the pineapple casing and garnish with chopped spring onions and meat floss.

Tuesday, July 1, 2008

Red Bean Paste


This is a recipe for Chinese Red Bean Paste as promised a while ago. Do note that this is the chinese style of making red bean paste. Japanese ones differ slightly. This paste is good enough for Chinese white pau, tang yuan (glutinous rice dumplings), spring rolls and the likes. But please don't use the paste for mooncakes cause they are not firm enough.

I made 400gm of red bean and it yielded a nice big box, which has lasted me for almost two months and I just keep using it for different things. Very handy indeed!

380 - 400gm of red bean
280 gm of sugar
250 ml of cooking oil
Water

1) Cook red beans like method in Red Bean Creme with enough water to cover the top of beans at all time. Once cooked, blend it with 2 cups of water till fine with a powerful blender or just use a hand held blender.

2) Sift through a fine sift/strainer in a non stick or heavy cooking pot or a wok like AMC.

To be honest, this is the hardest part especially when trying to push the mixture through the sift. I used a spoon to continue pressing and I ended up discarding two tablespoonful of red bean mixture which is too coarse to be sifted. Feel free to add water to help with sifting. Of course you can skip this step if you are those type that like little bites in their paste. In the older days, people will use a fine cheese cloth/muslim to do the sifting. Imagine that! I sweat for an hour just to sift all my red bean mixture through a normal kitchen strainer.

3) Turn on the fire and began cooking the paste. Add sugar. Cook mixture till water evaporates.

My sugar portion, I think, is minimal. Any less your paste will fall apart. Mine is just rollable. Sugar caramelize and coat the paste and help them to stick together. That is why for mooncake paste, they are usually very sweet as enough of sugar must be present for a firm silky paste.

4) Add oil in three batches. Cook till the paste can leave the side of your pot/wok in almost one whole piece.

At this stage, mixture may splattered if your water is not completely dried out. So be careful. I use Knife brand oil as it has a slight peanut flavour which enhance the fragrant of the red bean paste. You can use normal corn oil.

5) Completely chilled before using. Paste from fridge will be hard. Defrost to the softness you want before using.


Paste rolled into little balls for paus

Monday, June 30, 2008

The Joy of Baking

I have been asked many times on why I love to bake and cook, and where I got my interest from. I've always believed that behind this interest will always be an inspirational figure, someone like our mom, dad (not very likely if he's a foochow, unless if he's a cook), aunt, or even a friend's mother who'd always make creative lunches for her to bring to school.
However, note that the person does not necessarily have to be your own mother. In fact many times, if the mother is a superb cook, the daughter will end up not interested in cooking because the mother would easily get annoyed if anyone messes around in her kitchen.

My mum has always been a good cook but I attribute my love for cooking and baking more to my Grand Aunty, Yi Po. There would always be food in her house, even up till today, whether in Sibu or in Melbourne. When I was younger, I looked at her and remembered telling myself I wanted to grow up just like her. Well, I am still very much below par & have yet to reach her level of kung fu but I never regret the time I spent in the kitchen.

Part of the reason why I started serious baking was because it was very hard to ignore how much money we'd need to spend in a year from buying cakes as gifts. According to my Foochow calculations, 10 -12 cakes a year to be given away as gifts is quite a lot of money especially when we go for the good stuff. Of course we're not talking about the M or T shop.

I've been doing more serious baking for more than 2 years now & have found it a very enjoying experience making cakes for all sorts of people for all sorts of occassions; baby's first birthday cake, children's annual birthday celebrations, joint triple cakes for triplets, little girls' princess parties (Greg is usually roped in for mega projects like this), sweet sixteen & 21st birthdays, 80th & 90th still young-at-heart birthdays for the swinging granpas & grandmas, wedding anniversaries & Valentine's, christmas and any special days for cakes giving. One experience was very profound that a friend's FIL who was sick actually enjoyed a cake and he passed on not long after that.

Just this Sunday, I was asked to make 100 cupcakes for someone's special day as part of her wedding cake decoration. I really hope that they'd help to make her day a little bit more happier and sweeter.

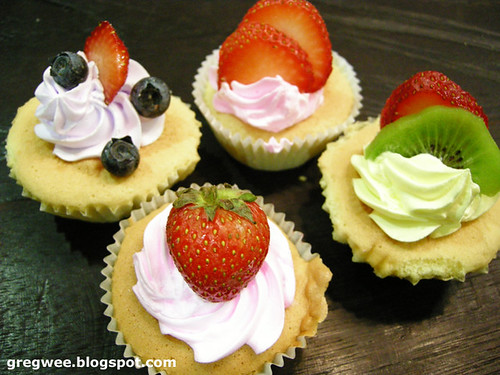
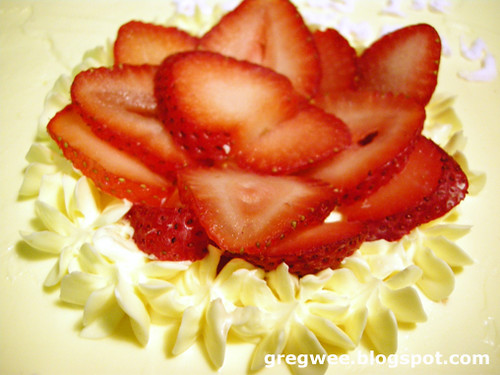
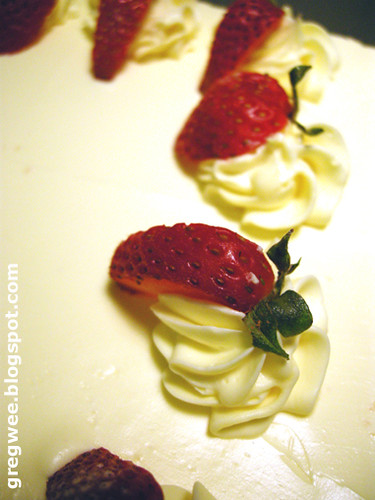
The best part about baking is when people take a bite, & you see a quite little smile at the corner of their lips. Cakes are about joyous occassions & celebrations. It's about bringing happiness & joy, no matter how little or fleeting, into somebody's life at a certain point in time, when they need it, or when they least expect it. That is the ultimate joy of baking.

Sunday, June 29, 2008

Buttercream Recipes

I have always wanted to look for nice buttercream recipes because they are not exactly an in thing these days especially with the craze over whipping cream. And of course, the pre-existing impression is that butter has fat and therefore it is unhealthy. Well, it is not the best food for the body and heart, but it is probably the lesser of the devil if compared with trans-fat in non-diary whipping cream, chocolate compound, margarine and so forth.

And if the buttercream recipe is good, it will have a wonderful sweet butter flavour which is not overpowering and the taste is rather light and melting without the waxiness. I have come across many buttercream recipes. Basically, buttercream is a composition of eggs, sugar and butter. But of course we cannot just throw everything in a bowl and whisk them into a cream because they dont bind well this way. Rather there are certain processes that lead to the binding of these ingredients.

There are the Italian Buttercream, the French Buttercream and there is actually an American one too. I personally have been using the Italian ones with a slight modification to enhance the richness of the cream. Italian buttercream normally uses what we called the Italian Meringue method which is whisking egg whites, add the boiled sugar syrup and whisk till foamy before incorporating butter. I use egg yolks. The result is more creamy.

A while ago a reader, Pansy asked me about buttercream recipe. So I hope this recipe will be alright for her.

45 gm of castor sugar
35 gm of water
4 egg yolks or 3 egg white
350 gm of salted butter

1) Whisk egg yolks till into pale and light. Boil water and castor sugar till the mixture reaches a soft-ball stage.*

* Soft ball stage is when you drop the syrup into a bowl of cold water, it will form a ball. If you have a kitchen thermometer the syrup will read at about 120 deg cel. Many bakers especially the French are very precise with their baking and they have good reasons to do so. If buttercream formed with syrup at this stage, it will be more stable, smooth and spreadable. Do not overboil. A little below is ok but a little over is no good. But at home, I suppose we can be a little more relaxed. Even though I have a thermometer, I just learn to recognise the look. I would normally just boil the syrup to a stage that looks really thick, the bubbles look big and the mixture looks transparent sticky.

2) Slowly pour in the sugar syrup in streams while continuing to whisk the egg yolks mixture. If you pour straight in especially too near the whisk, the whisk spinning too fast will push the syrup to the side causing hardening around the bowl. Of course, eggs may be cooked if too hot and fast. Continue beating the mixture till foamy and thick. If you use egg whites, the mixture will turn glossy and thick with a soft peak (this is the Italian Meringue, which can be used for mousse later, especially the fruity types). Beat till the side of the bowl is starting to cool down. If the meringue is too hot, your butter will all be melted and watery.

3) Add good quality pure butter in small cubes. Butter should be semi hard, not frozen or totally soft. Beat till the cream is form. There should be no hard pieces and the mixture will be so smooth and spreadable yet can be used to pump very well defined patterns.

4) Use to ice a 8 inch cake 2-3 layer cake.

Note:
If you taste buttercream that is waxy, there is almost a certainty that shortening is used. Shortening is cheap and helps to fluff up the mixture.

Nuffnang Ad